Starting My Van Build (Inspiration)
I wasn't sure exactly how to start this portion of the retelling of my van build. Do I do it by time or by category (electric, ceiling, floor, etc) or by some other way? I decided to just start the retelling and however it unfolds will be the way I intended it to go :D.
Maybe we should start with inspiration. The inspiring examples of van builds online are endless! And I mean endless. Something I learned about myself this past 2 years is that I have ADHD and (something that I knew about myself already, but didn't have the words for) one of the characteristics of ADHD is the desire and ability to research a topic of interest until you feel you have learned everything you can or your hyper focus runs its course. So when I tell you I have spent about 4+ years researching and studying other people's van builds like my very existence depended on the knowledge, then hopefully you'll understand what I mean. As an artist, a lot of this focus was on the aesthetic of a van build. Yes I was interested in functionality and the internal workings, but I wanted something that worked but, most importantly, was cute. The cute factor is key. I'm going to insert a few inspiration pictures in here (most of these are from Pinterest and had no links for credit, but I will try to put links where I can) so you get an idea of where my head floated during this whole thing.

I really loved the functionality and style of this one. Having open shelving is nice so I don't forget about things, but things would just fly around the van. The bungees keep things in place and are visually really interesting.

I didn't love some of the clutter in this picture, but the mix of textures I find really interesting. Rattan, linen, jute, wood, bungee, all with a similar colour palate that keeps it cohesive even in its variety.

Mostly about the structure, this one was appealing because of how efficient it was while still being cute. I also really like the slots for handles, which is nice in a tight space so you don't constantly hit the drawer handles.
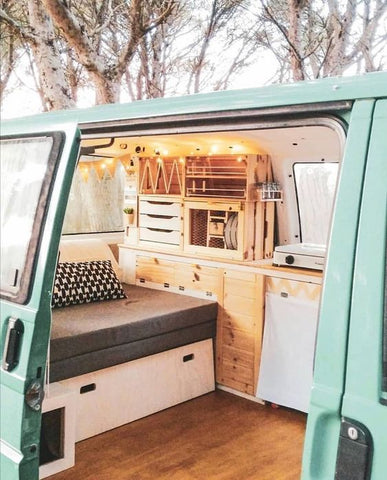
Another example of bungees working in a practical and aesthetic way. I also really loved the colour combo of the soft mint/sea foam green with the neutrals.

Ok so you can't see much of the actual van set up, but this one is all about the colours, patterns, and textures. I have loved that stripped mattress ticking for a while so I'm definitely trying to include that in my build. Curtains are also an interesting challenge. Do I have fixed ones or ones I put up and take down? Not sure.

Definitely not achievable in my small van space. But the colour palate is what I've been drawn to and I love the idea of macrame tie backs for curtains.
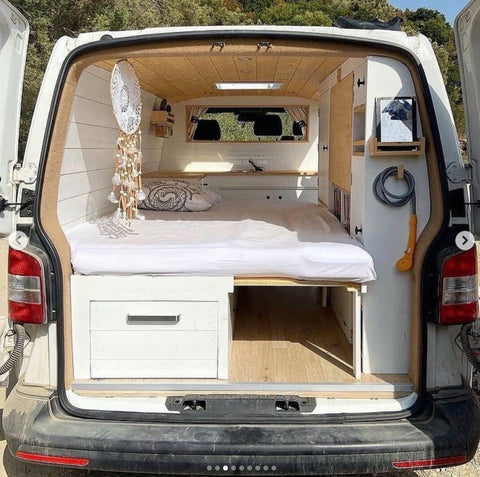
This one (link here) really drew me in because of the layout, the panelling, and how clean and efficient everything seems.

Ok so this one (link here) is basically just everything I've been liking. Bungee storage, clean lines and efficient, the fridge is the one I ended up getting, and just an overall beautiful set up.

Not a van, but this one (link here) has the texture, colour, and mix of styles that I am usually drawn to. I've been finding myself seduced by the clean modern lines of a lot of van builds, so it's good to be reminded of a style that I have proven time and again that I love.

I love quilting when I move into a new house (my van is sort of a mini house) so this (link here) is some inspiration for a colour palette and patch pattern that could be nice. It might be a bit before I do a quilt specifically for the van as I'm not feeling the sewing motivation, but I do have all the material so it will happen!

And finally another soft and multi textured example. This one (link here) has a really nice balance of the wood, white, linen, and green colours.
After I looked at all the pictures I had compiled over the years, either on a Pinterest board or saved on instagram, I had a bit of an idea of the main things I liked. Wood panels, a mix of unpainted and painted wood, some open shelving with bungees, simple lines without too much clutter. These really helped me to also figure out how I wanted to put my build together. And then I also thought about the essentials that I wanted apart from the aesthetic. I wanted things to be tucked into their own spots (dedicated storage and shelving), toilet & fridge (a space for each that were big enough to accommodate, meaning probably a larger cabinet on one side), a bed/couch conversion that could be removed (fixed points to secure the frame while it was in the van), and the ability to stay mostly self contained (sink or water source and electrical source).
Once I knew the general aesthetic I wanted and my essential elements I was able to start planning. I'm going to insert some of my early plans so you can see how much my concept evolved over time.
The very first one is my Jeep camping layout and then these next few were when I was still considering a larger van.


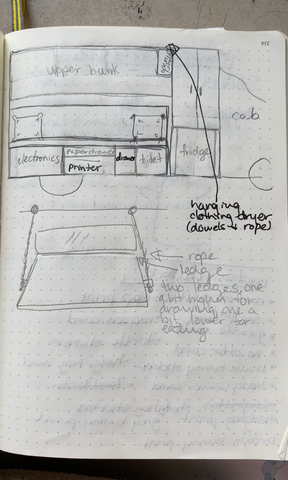
And the rest are when I settled on a Ford Transit Connect, so there is a bit more of a realistic size and proportion layout, sorta lol.


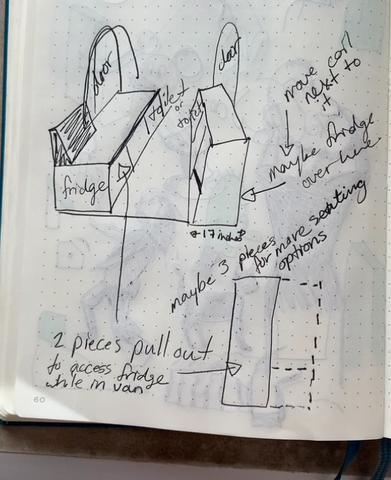
This last one I did after I stayed in my van a few times I believe. so a bit more realistic in terms of where things would be situated. And how the height or width would allow things to fit.

You can sort of see in the whole evolution of the drawings when things became a bit less fantastical and started making actual sense in terms of measurements and placement. It's fun to see them all laid out next to each other!
So there you have it! I had my van, an idea of how I wanted it to look, and the beginning process of planning the layout. But as anyone who's built out a van will tell you (or at least the unorganized ones will) things change along the way so you have to adapt while you go. I had a really rough idea, but measurements for my van were hard to find online, so I wasn't sure how wide things would be once I removed the factory side panels or the height of the ceiling once I removed the flooring and installed my own. So all I could do was start and make decisions as I went! All will be revealed in the next blog post :)
Thanks for reading! XX