Van Build (The First Four Steps)
Ceiling Fan | Back Window Install | Roof Rack | Soundproofing/Insulation
Alright! I guess now is the time to get into the meat of the van build project! Even though I bought my van in August of 2021, I really didn't start the serious conversion process until January 2022. There was a couple factors to this. But the main one was that I planned to get help with the ceiling fan (I'm willing to try my hand at most anything, but cutting a hole in my van ceiling was a bit daunting). Once everyone found a time that would fit our schedules, I could really start to plan my process. I laid out a basic order of events that I thought would be a good:
This was more or less my basic order of events that I had in my head. Most of it, like the walls, insulation, carpeting, cabinets, I planned to do myself. But the parts that I either needed help with (window, ceiling, electrical) or discovered I needed help with (floor), I needed to schedule it around other people's availability and so things took a bit longer because of that. I also had the absolute hardest time finding roof rails for my van. For whatever reason anytime I called someone they didn't understand what I was asking for or it just wasn't possible to order it (if you can't tell I could do a whole blog post ranting about my roof rail/rack trial).
Ceiling Fan
I'm so so grateful for the help that I got with this. I was really nervous about it, but I was also really nervous about someone else doing it too. I had done all the research of watching other van builds and fan installations. So I was a bit worried that the person who did this wouldn't know the tried and true ways of "van builds". I'm sure this was an entirely irrational thought as the majority of the videos I watched were people who had about the same level of build experience as me. But either way, I sent him a few videos of the process and got all the materials that I had seen in the videos for him to use. What a saint! So patient to deal with all that haha! But in the end the fan came out great, and I'm super pleased with it. Actually, later on, I realized I had accidentally bought the Maxxair fan that only exhausts, taking air out of the van and not one that could rotate the other way as well and bring air in. When I realized that, I was a bit worried that I would be too hot in my van without fresh air from the fan (and I may at some point find that to be the case) but while writing this from the future with a few trips under my belt, I can say its been mostly ok.

Back Window
After staying in the van a few times in the fall, and seeing how dark inside could get if I had to keep the door closed or it was raining, I knew that I wanted to install a window somewhere. Originally I thought I'd do both, but its pretty expensive and the shop that did it had only the one in stock and would have had to order the other, which would delay my build a bit more. I opted to just get the one window, luckily it was on the side of my van that would have my bed/couch!


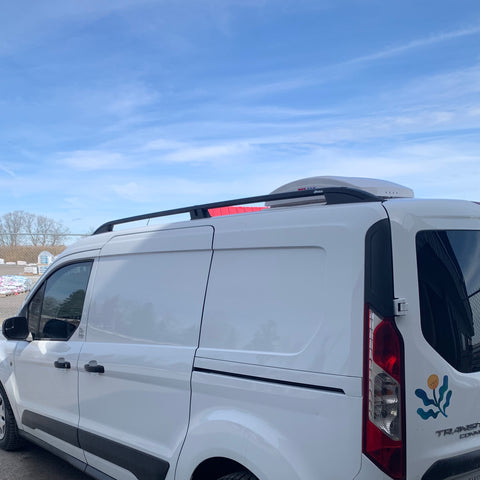
Roof Rack
Like I said this was a very frustrating process. Apparently the Ford Transit Connects can't have the roof rails installed after the factory (according to the Ford dealership I called anyways). After lots of research and finding obscure ford community forums, I found the rails that I ended up with which are actually for the Touro I believe. But since they have the same exterior body as both the passenger and cargo Transit Connects, it worked. I think this whole process was the thing that honestly held up my build the most. I thought that I needed to have these installed before putting the ceiling insulation and ceiling panels on, which didn't really turn out to be the case I don't think. But either way this was the next thing that was completed on the list. And wow was I glad to get that off the list!
Before & After

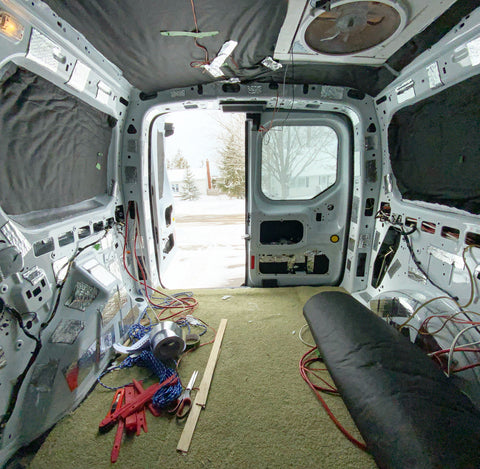
Soundproofing/Insulation
Every person who builds out a van seems to have a completely different view on what insulation to use, whether sound proofing is actually a necessary step, how best to install the insulation etc. The whole van process is just 100 different possible solutions with no agreement on best practices haha. But I found this especially to be the case with this step. All the other ones I had had a clear idea of what would work best for me based on my van and how I wanted to use it. But this one seemed so vague! I ended up using the 3M Thinsulate SM600L Acoustic Thermal Automotive Insulation for Van & Car. I think there are other options that have a better R value (how well it insulates) but I knew that I wouldn't be staying in this in the middle of the winter, and probably not very often in very hot conditions. So my biggest concerns was a moderate amount of insulation and added sound proofing (I also used 10mm sound deadening material I got off of Amazon, sort of a putty type material in sheets). I saw someone talking about the thinsulate which was fire resistant and mold resistant because it's a synthetic material. As much as I would have liked to use an organic wool or something that was super environmentally friendly, I wasn't convinced that the humidity wouldn't get in there and make it smelly, heavy, and create a mold problem. But I'm not an expert, this was just what finally helped me make a decision. So far I've been pretty happy with my choice. Especially when I had a bit of a leak! For the floor I decided to go with a material that seemed to be sort of a midway point between this putty material and a foam insulation. Here is a link to the auto insulation on amazon because I really have no idea how to describe it.

So there you have it! The first four steps of my van build process and hardly making a dent in the whole thing! Next time I'll talk about the next four steps in my order of van build events. Until then, take care!